14 Recipe - Using MIDI generators
In this recipe we’re going to use a MIDI generator tool - Euclidean Sequencer Pro - to generate the initial MIDI information which is then fed into additional tracks using techniques discussed in Recipe 2 - MIDI Tools and Routing.
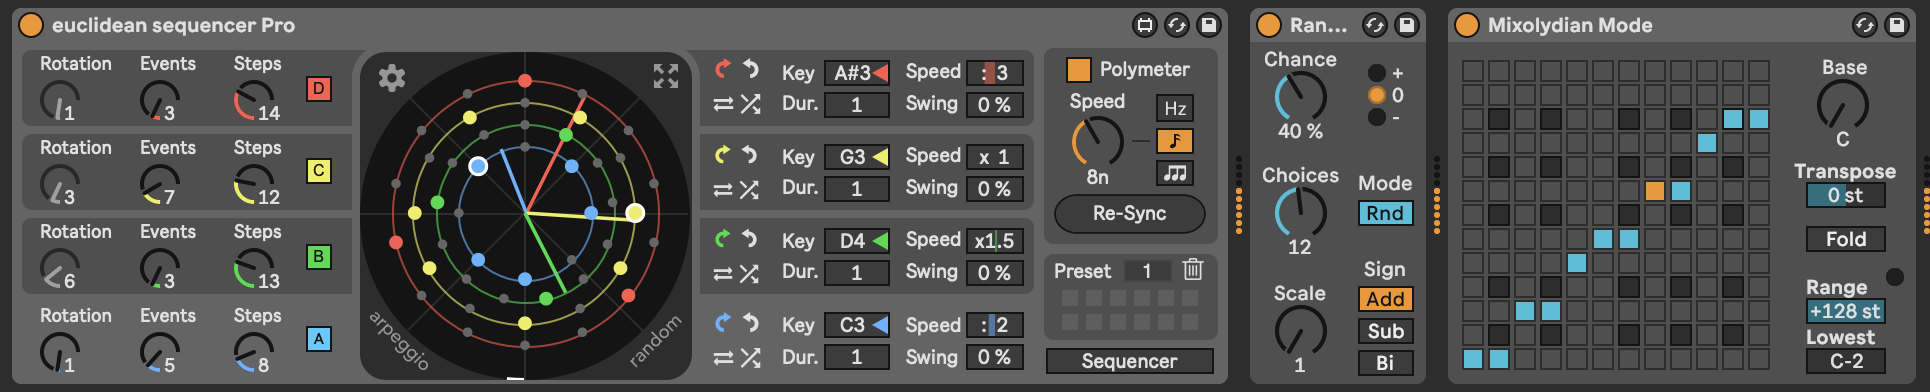
- Place the Euclidean Sequencer Pro generator in a track. Euclidean Sequencer Pro is a Max for Live device which can be used to generate polyrhythmic sequences of notes, and is typically used for rhythmic patterns and because of this, by default it only generates 4 note values. Because we’re going to use it here for more melodic output, we’re going to add Random and Scale MIDI devices so that we generate a wider range of notes.
Feel free to set up the Euclidean Sequencer Pro device to generate a variety of pulse Events across a variety of Step values for each note. It’s nice to mix up odd and even Events, Steps and Speeds across the 4 generators. This ensures that we don’t just get a repeating pattern, although it might also be interesting to explore a combination of predictable and more unexpected patterns (balancing the unexpected and predictable!). We can also use modulators to shift the Rotation / offset of the sequences to add additional unexpectedness if that’s helpful.
- We’re now going to use many of the techniques previously seen in Recipe 2 - MIDI Tools and Routing, where we take the output from the Euclidean sequencer and then route it to a number of different synth engines while also applying some additional MIDI tool processing.

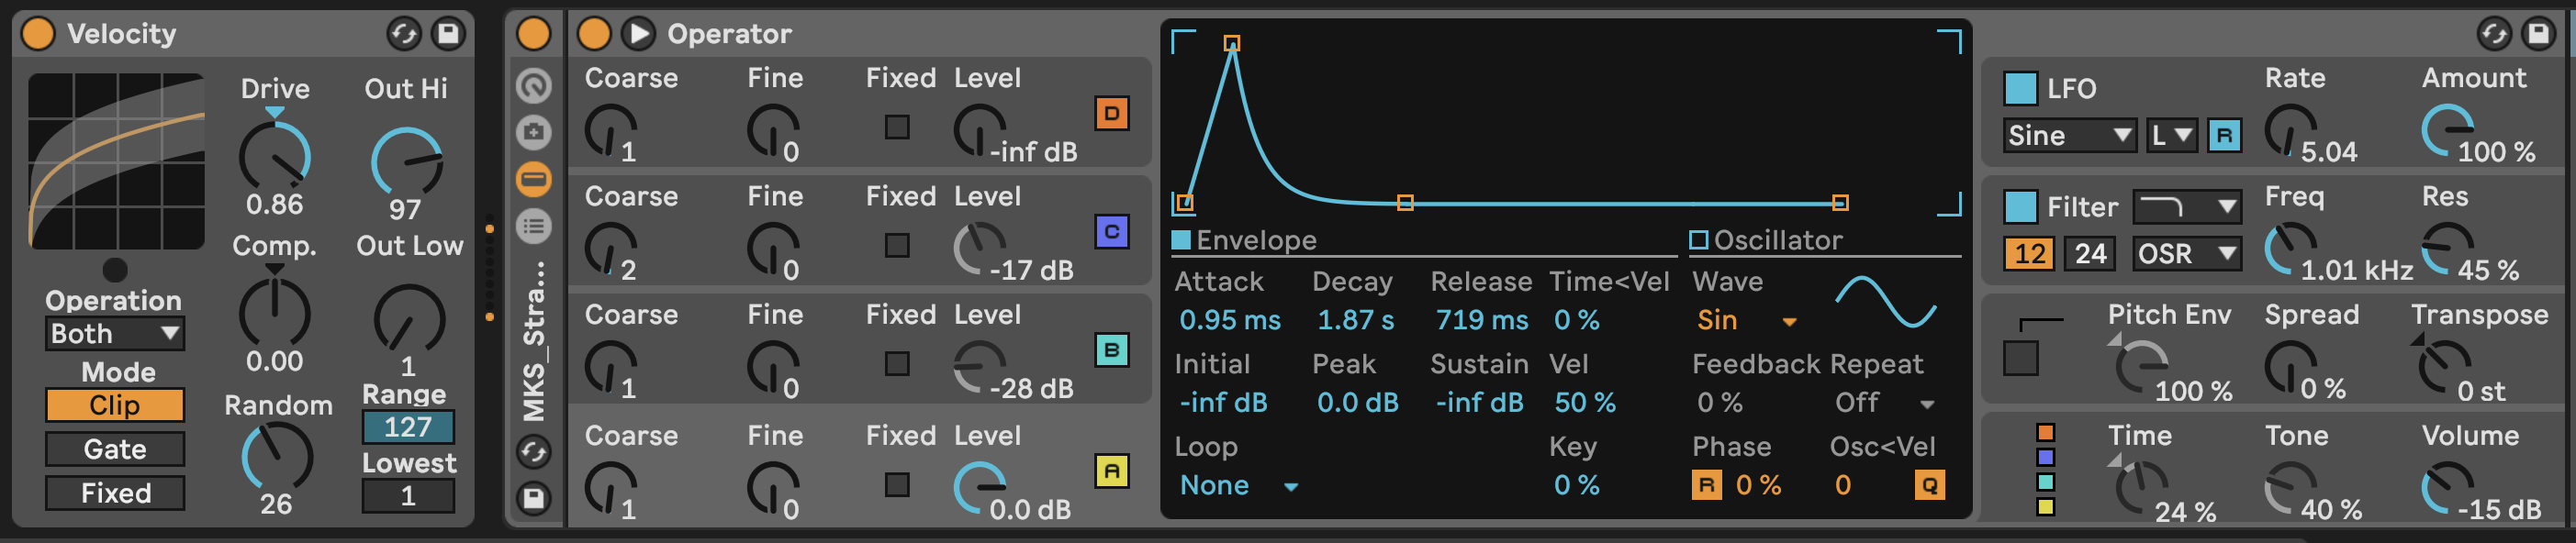
First, let’s take the “raw” output from the Euclidean Sequencer and route it into a MIDI instrument track using a plucky Operator sound - could be a simple sine wave with no sustain and fairly quick decay.
- Create another MIDI instrument track where we’re going to take the same Euclidean Sequencer Pro MIDI information, but now use the MIDI Note Echo device to delay the input by an amount (I’m using 16 16ths = 1 bar). The key thing is to MUTE the original MIDI information. Also add a Note Length MIDI device to turn the incoming MIDI notes into chords. We can then use these delayed and “smeared” MIDI chords with a pad sound. I’m using Wavetable, but you can choose a pad sound from any virtual instrument.

- Create another MIDI instrument track and use the MIDI from the chord “pad” track we’ve just created as the input. Be sure to set the input to “Post FX” so that it will apply the MIDI device effects to transform the MIDI before routing it into the new track. In this track, we’ll add an Arpeggiator MIDI device. We can use a bell like tone for this track. I’m going to use Operator again, with some modulation applied to the second modulating oscillator (which will then vary the tone of the main Sine wave carrier oscillator). I’m also going to apply modulation to the rate of the Arpeggiator device. You can try out various settings here, including using an unsynced or “Free” running Arpeggiator rate. You may need to tailor the amount or range of modulation to get Arpeggiator rates that don’t swing too far between VERY quick and VERY slow.

Feel free to continue adding additional tracks to bring texture and a variety of tones to your track. I’ve included a “choir” and textured pad tracks. Experiment with where these take the incoming MIDI information from, and how you can manipulate the MIDI further using a variety of MIDI transformation devices.
You could also experiment with other MIDI generators discussed in Chapter 13, such as Bouncy Notes, Turing Machine, Less Concepts, etc. The MIDI generating tools provide the raw stream of MIDI notes, but the effects here are used to provide the texture around that sequence.
Press play. Sit back and relax.
You can hear my version of this track here: https://soundcloud.com/mikeksmith/euclidean-nonrhythm/s-dhj7xJVXSJU