Process - Note-wise probability
Ableton Live 11 introduced the ability to set the probability that any given note in a MIDI clip will play, in addition to its velocity. This is a game changer for the Lazy Producer. Adding variation to MIDI parts is now much easier if you define the lower probability for “fill” notes and higher probability for notes that you want to “anchor” in the clip. Lower probability means that each note is less likely to play, while higher probability means that each note is more likely to play. A probability of 100% means that the note will ALWAYS play.
Key idea
Using probability with MIDI notes means there is a chance that the note will play and some chance the note will not play. Using probability takes us beyond static, predictable loops and into a territory of surprise and variation with each cycle.
Drum parts
One clear use of this is in drum parts. You can program the core drum part that is constant throughout the clip or song, but then have additional notes that only occasionally play because these have lower probability. One use of this is to specify “fills” or flams. When playing with a live drummer it would be odd if they played only the core beat absolutely unchanged throughout the song. Usually they will add notes and flourishes to add character to the beat and to express themselves. You can achieve something like this through these lower probability (and often lower velocity) notes in drum parts. Unfortunately, you can only set the probability, not a specific condition like “Play once, then miss the next 3 bars” (a feature found on some hardware sequencers, like those from Elektron).
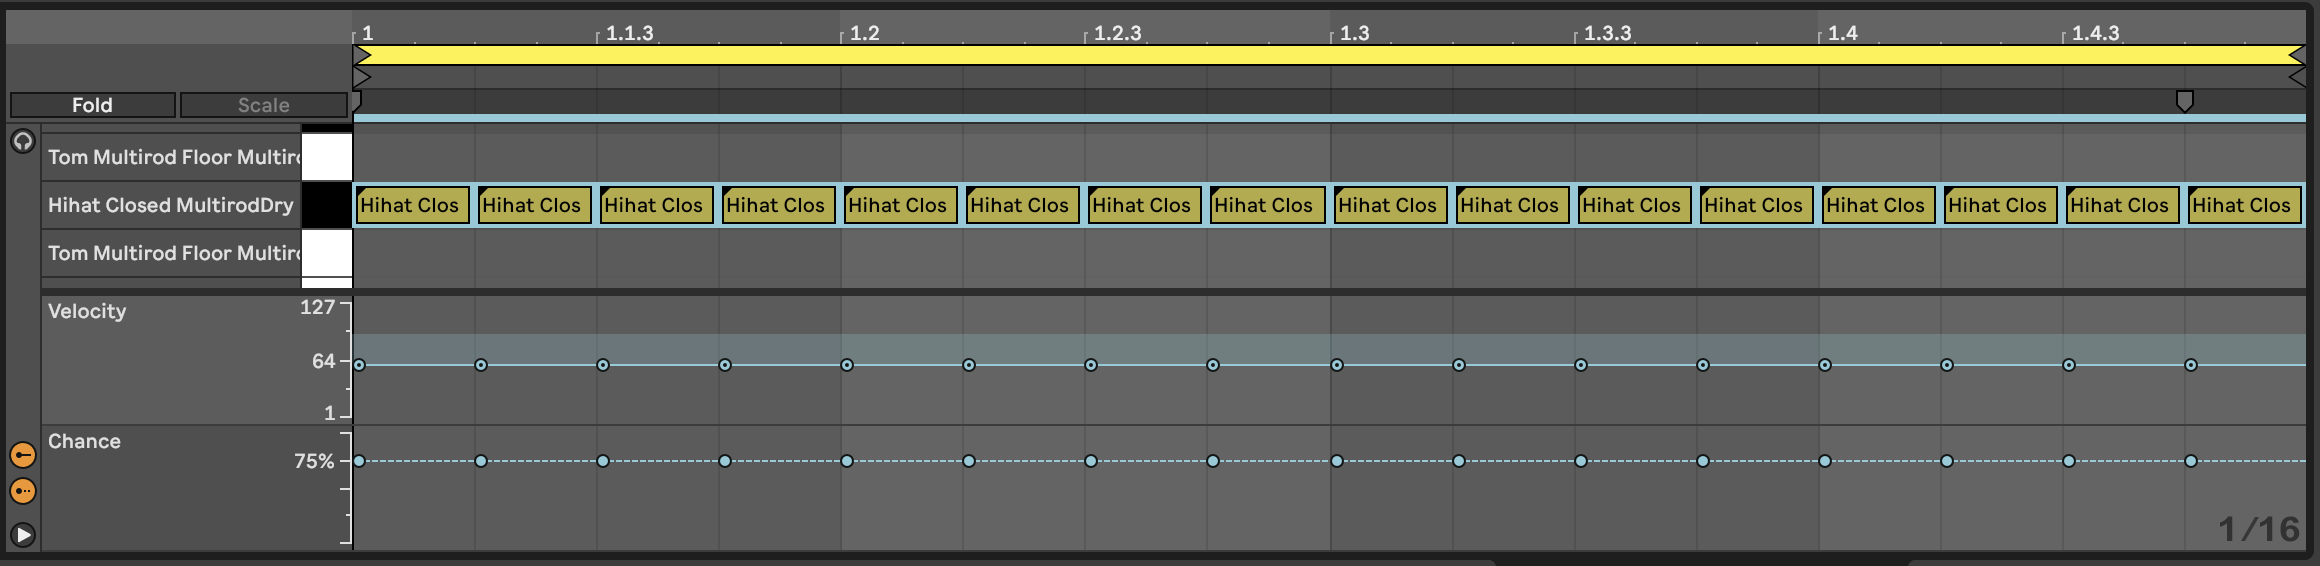
To see the note chance, click on the MIDI clip then click on the arrow at the bottom of the piano-roll to show velocity. To see the chance / note probability, click on the button below the velocity.
In the clip below we’ve set up a Hi-hat pattern of 16th notes. Note that each of them has a 75% probability of playing, and I have added a little random variation to the velocity of the hits. When we play this clip looped, the Hi-hat pattern will be different each loop and will add a little variation and interest.
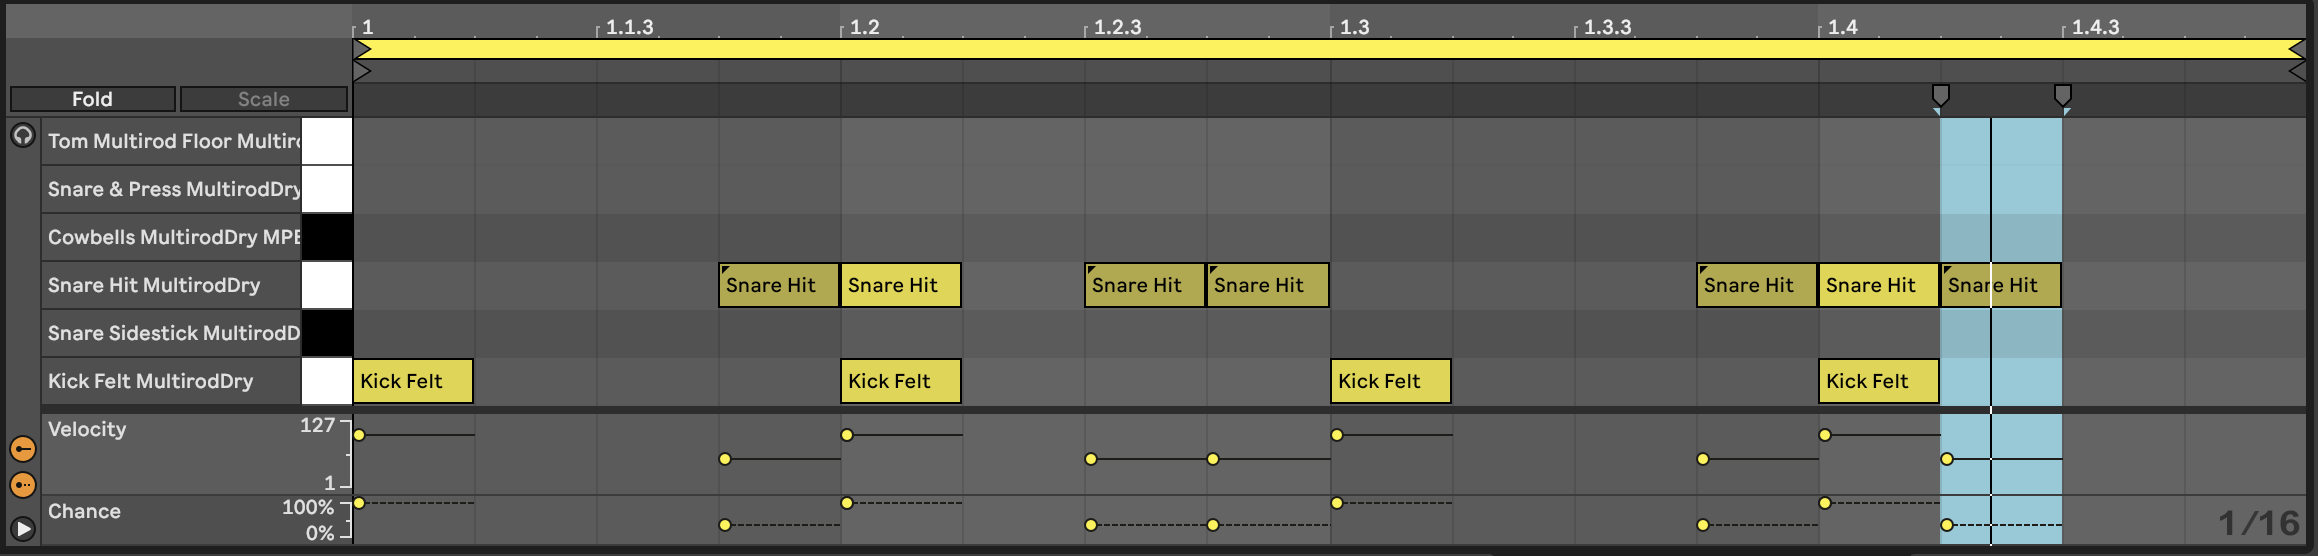
Likewise we can add some additional snare hits in the Kick and Snare clip. In the clip below the snare hits on the 2 and 4 of the bar are always going to be present. But the additional hits may only trigger occasionally. These also have lower velocity which gives them the feel of “ghost notes” - barely heard, but present. This will add a little spice and interest to the Kick and Snare parts.
Combined with the Hi-hat part above you get a drum part that has a decent amount of variation without having to program a lot of different clips or parts.
But the note-wise probability extends beyond drum parts.
Lead parts
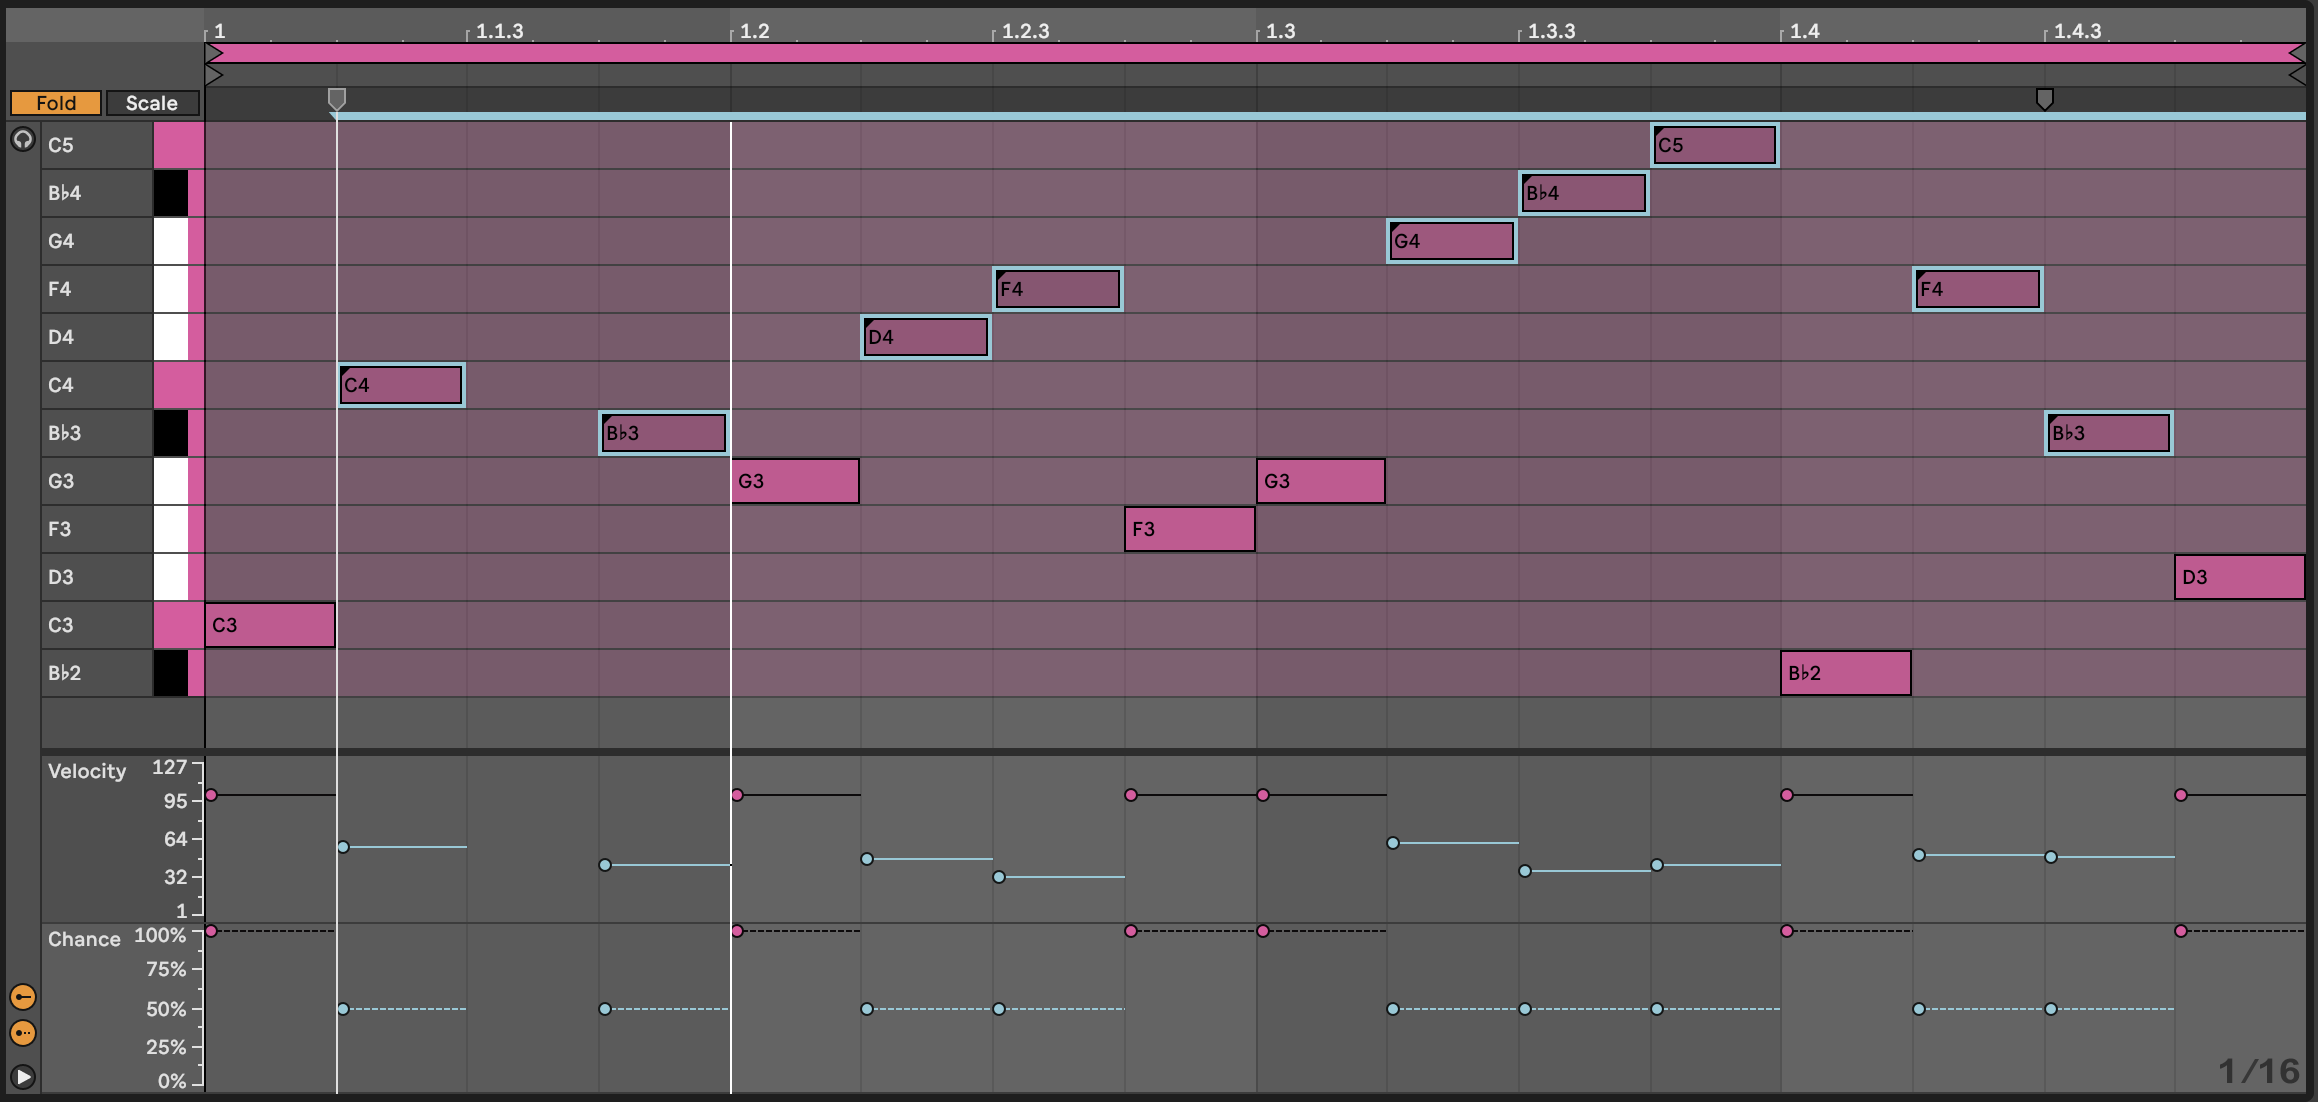
In the clip below we have a repeating pattern across the notes C3-C4. Notes from F4-D5 have lower velocity and also lower probability. When we play this clip, we’ll have a repeating pattern on the lower notes, but a changing pattern on the higher notes. If you then use the velocity information to change the timbre of the note, then this will add some light and shade into the pattern. This can often be very effective when playing monophonic synth parts, where only one note can play at a time. The higher notes will force lower notes to stop playing which will mean that the lower repeating pattern is never exactly the same each time. Adding a little glide to the sound will also give a little “swoop” as the pitch changes.
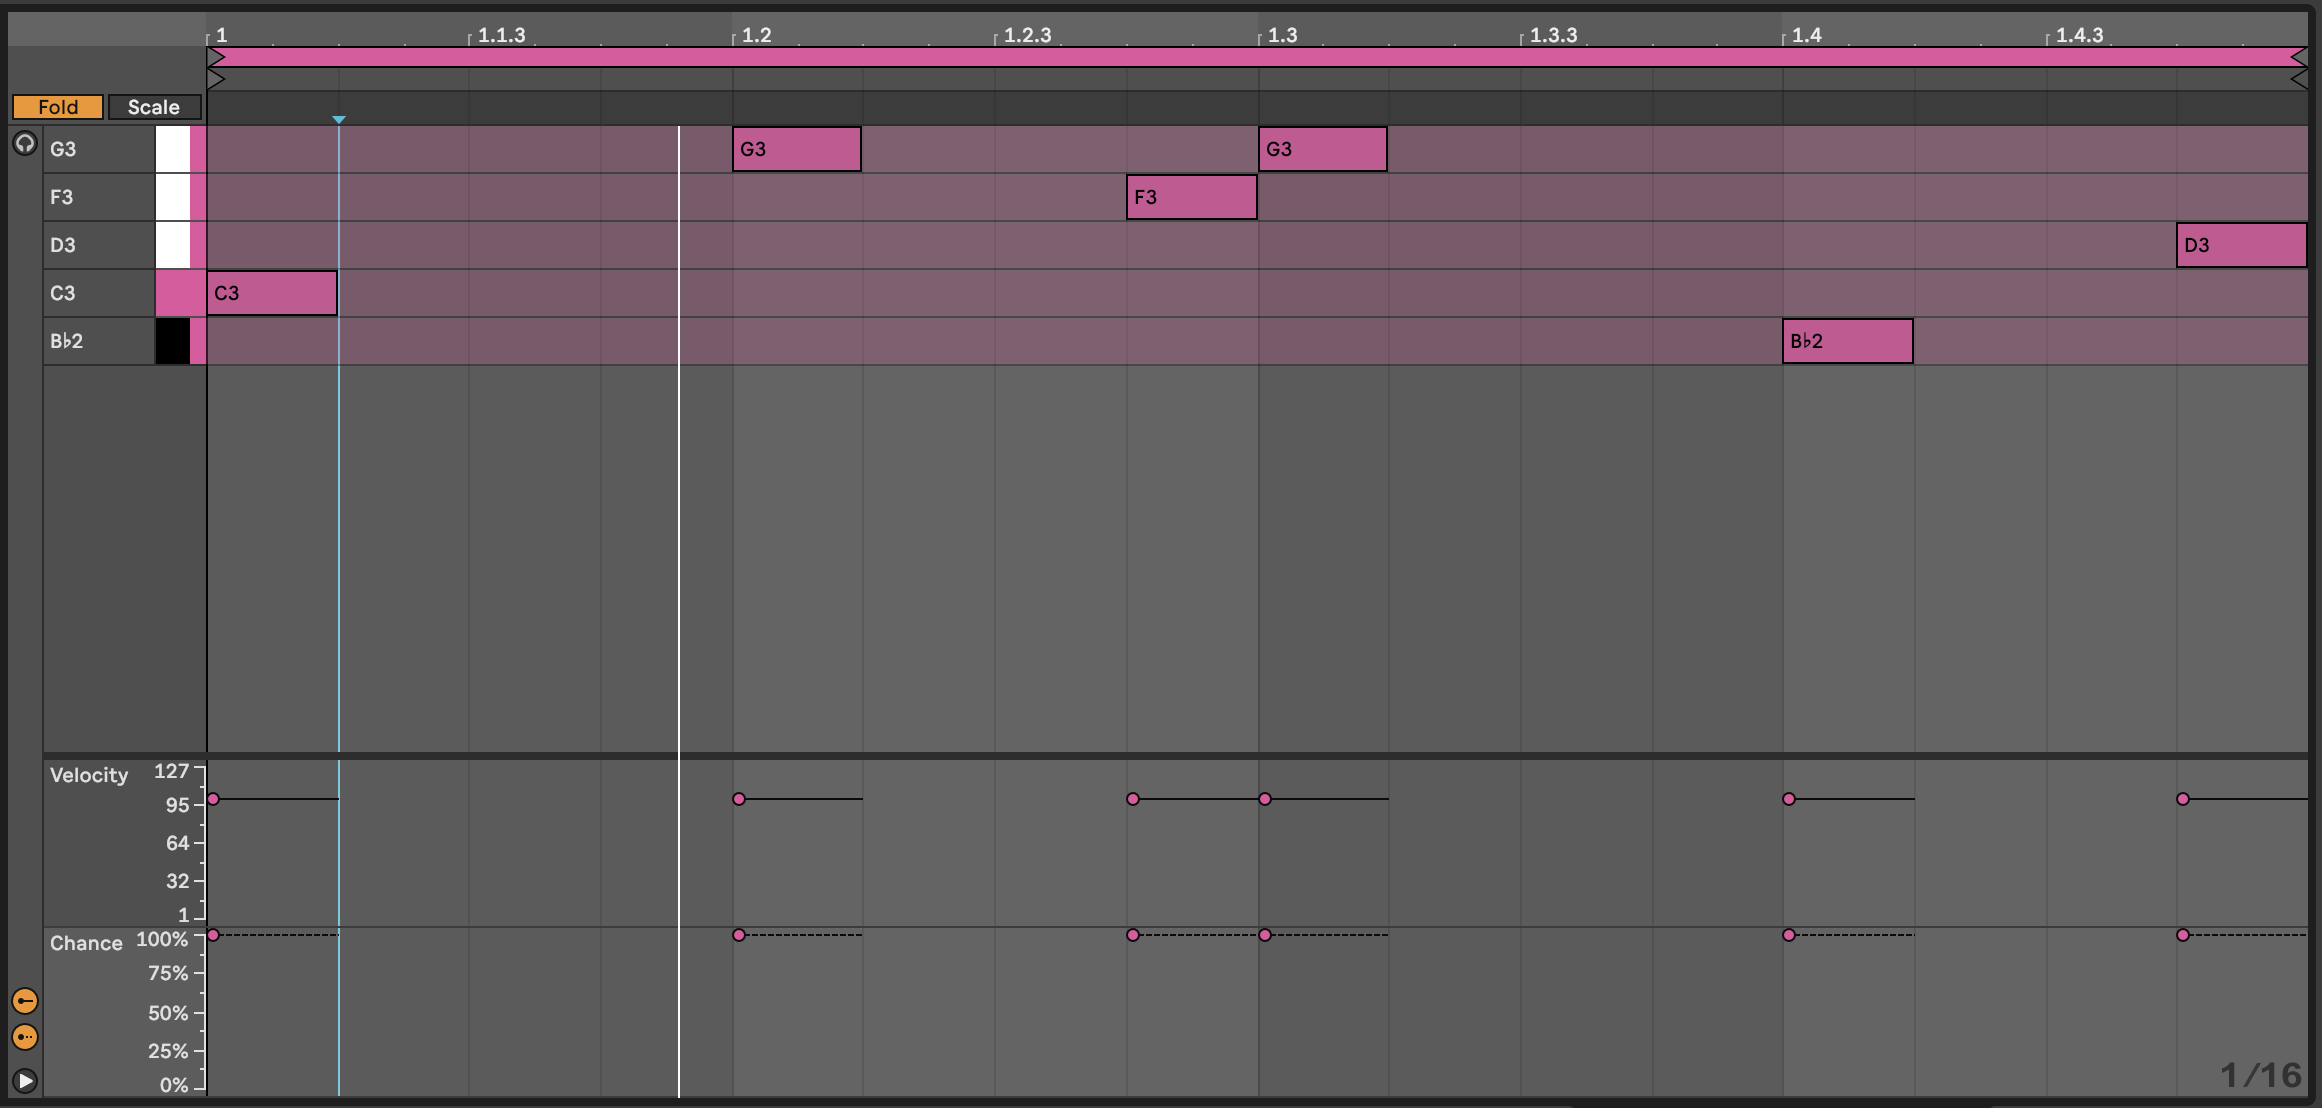
An extension to this technique is to separate the lower, repeating pattern and the higher notes (with lower velocity and lower probability) into separate clips on separate tracks:
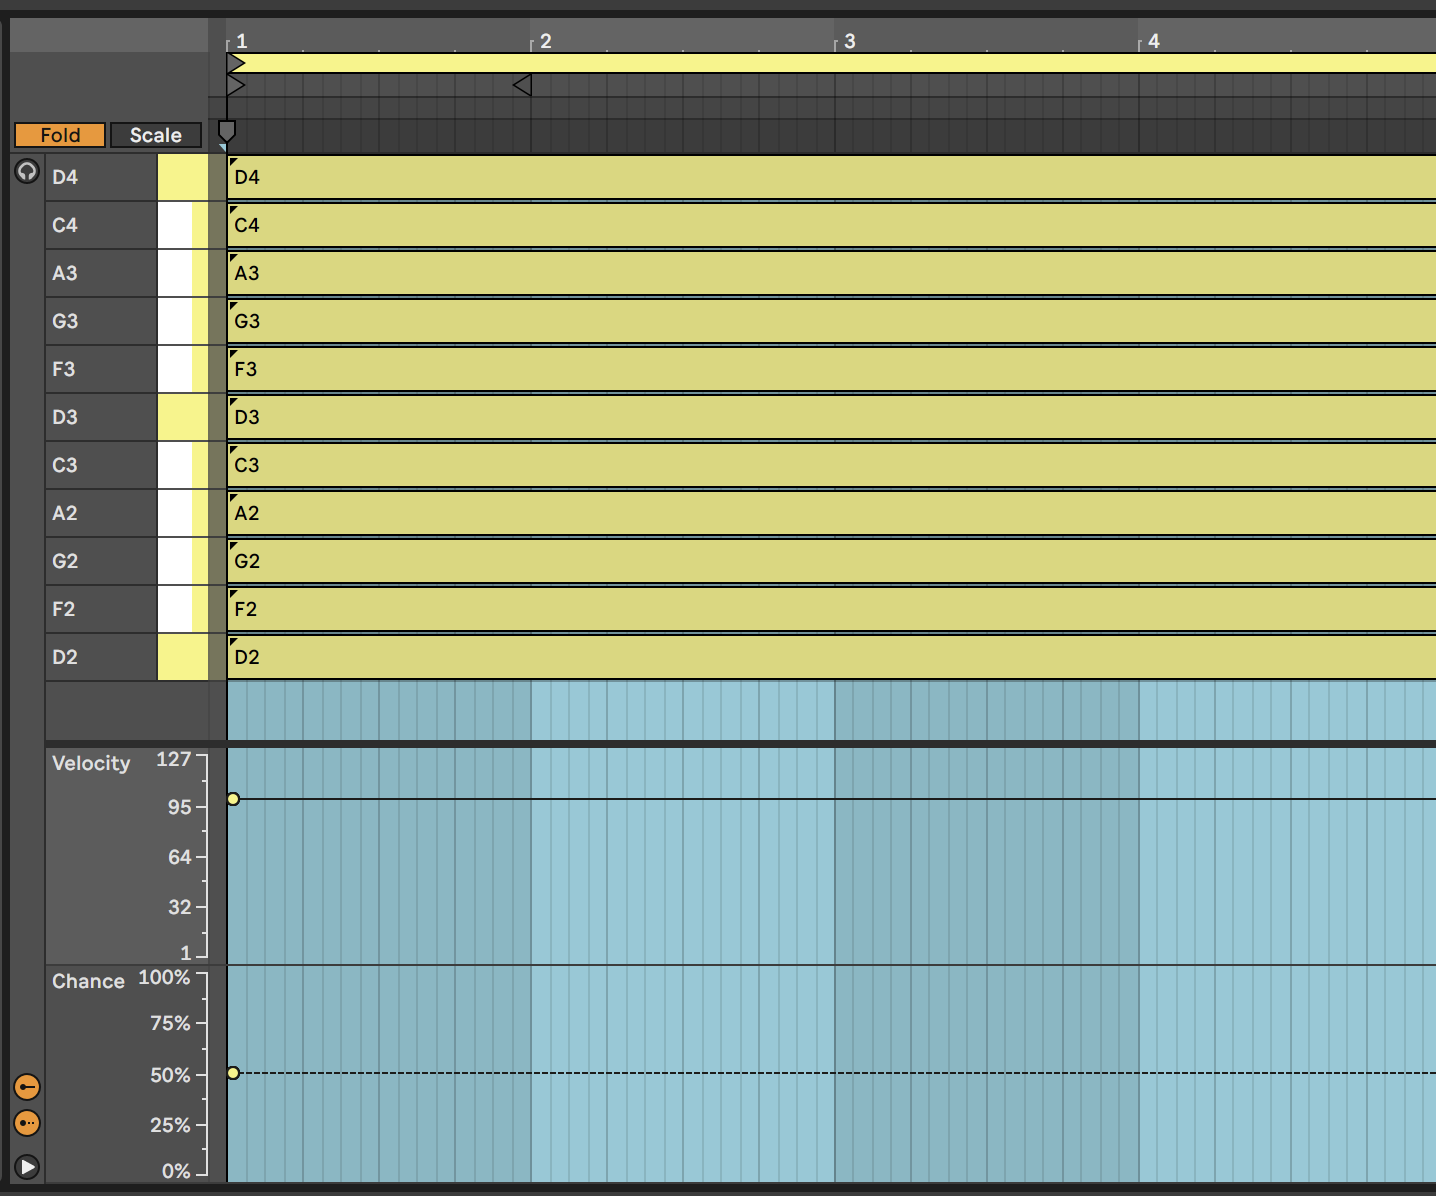
Lower part on one track: (Note that “greyed out” notes will not play)
Higher part on a separate track: (Again - “greyed out” notes will not play)
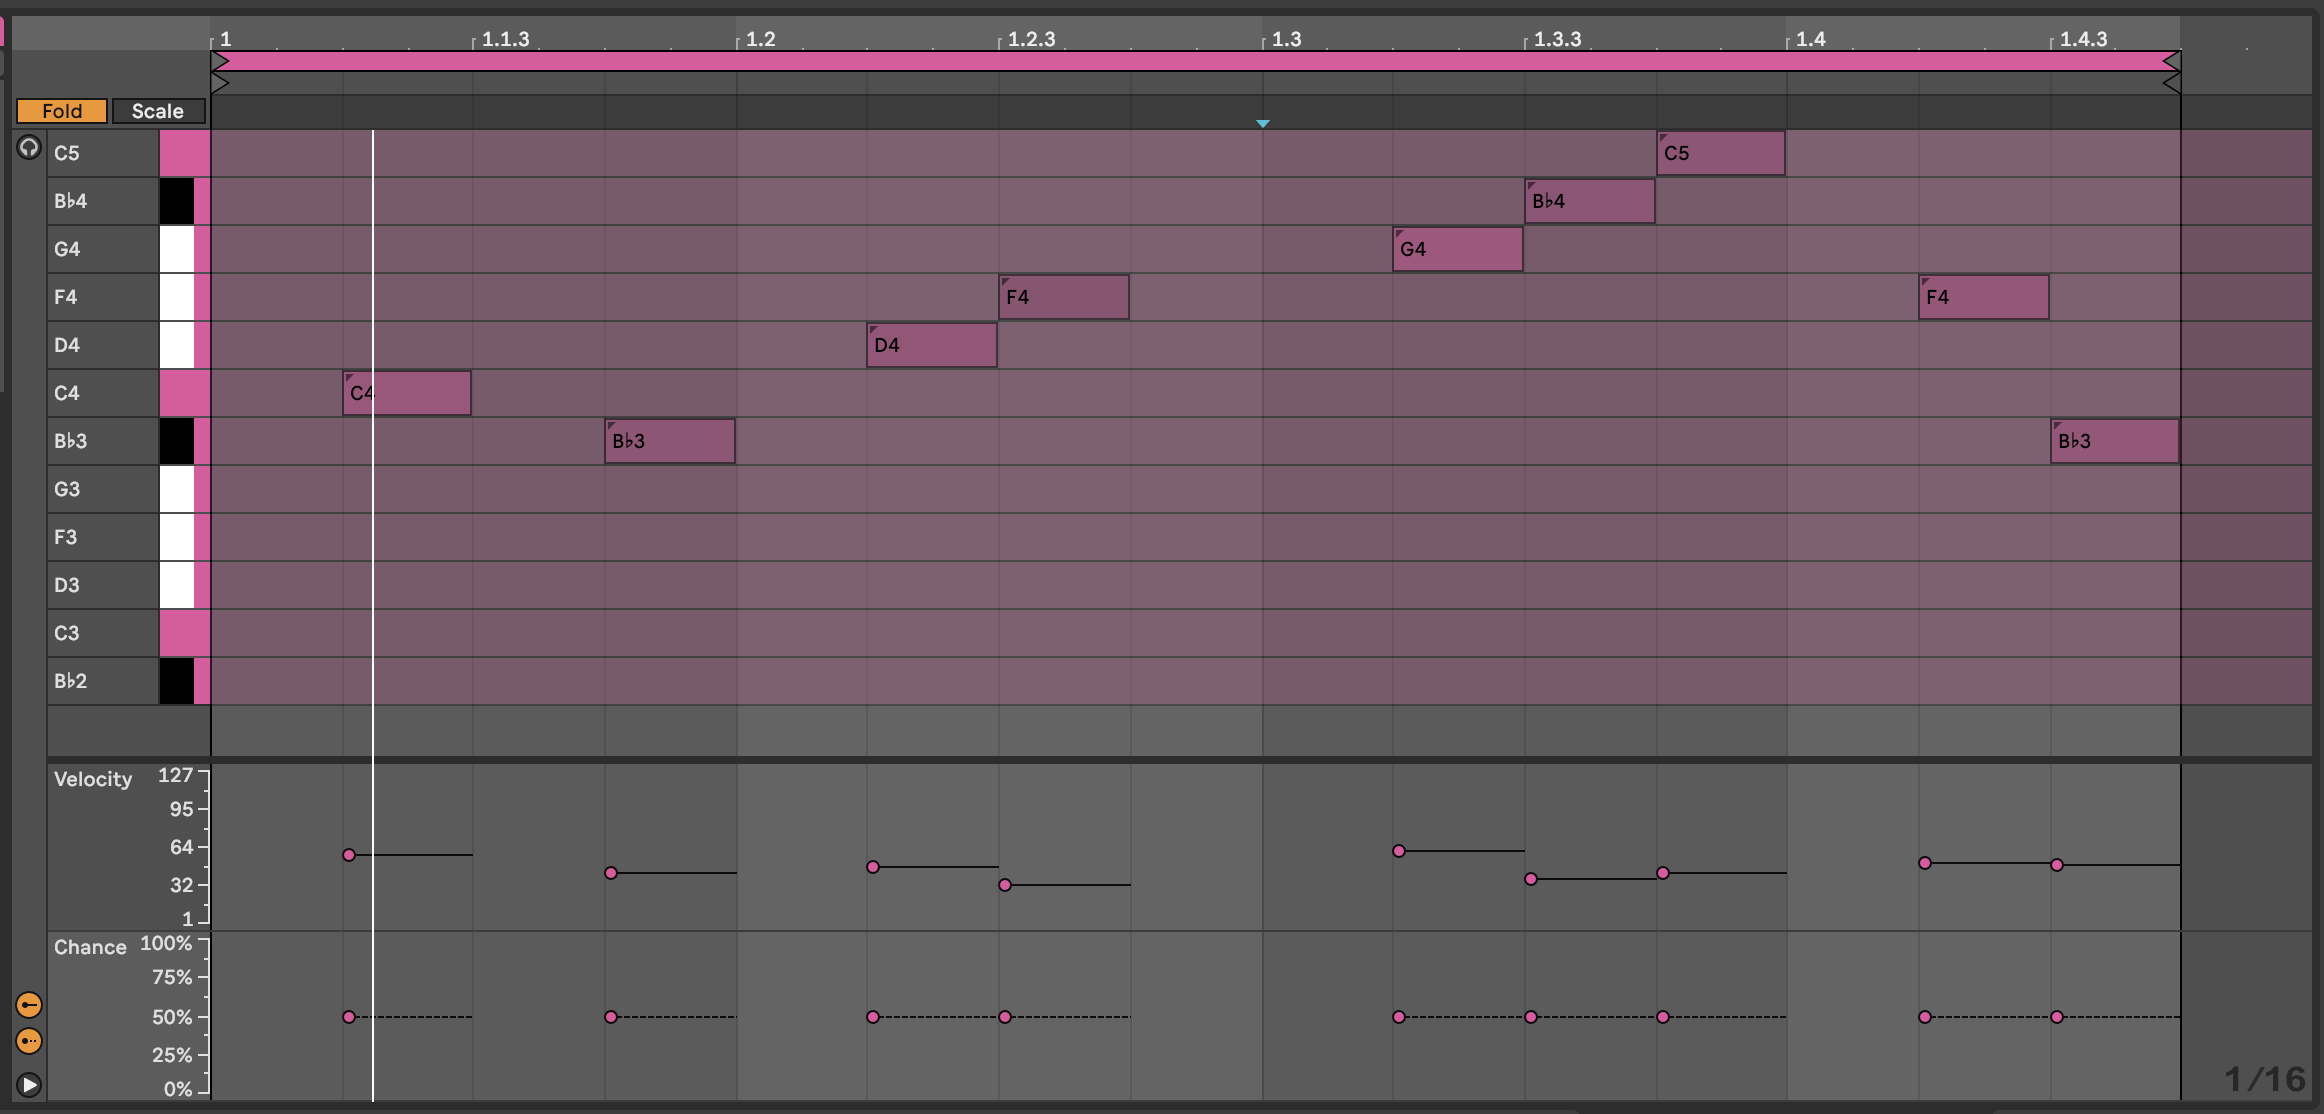
The advantage of splitting the parts into separate clips (and separate tracks) is that you can shorten the length of the higher note clip - here it’s 15 1/16th notes long. That means with each repetition, the notes appear at different positions in the bar and so evolve against the repeating pattern. This is a key concept in balancing predictable and unexpected, as we’ll discuss later in Process - Balancing the unexpected and the predictable.
Note that we can route the output of each MIDI track to the same instrument (using the same MIDI channel for external gear). By having some sound design settings in the instrument react to velocity input e.g. filter cutoff we can make the one instrument sound like two, with the two parts interleaving and weaving in an out. sAlternatively, having the notes in different tracks, you can keep the repeating pattern “dry” and apply delay or echo to the upper part.
In Live 12 the new MIDI Generation and Transformation tools allow us to generate and transform (SHOCK!) MIDI notes in a clip to generate patterns of notes, to adjust velocity, timing and other attributes. We’ll discuss these more in Tools - Live 12 MIDI Generation and Transformation but these tools might be helpful in creating interesting clips.
Chord parts
In Recipe - Changing chords , I suggested using probability on the notes within chords. If you add 8 MIDI notes in a chord and specify 50% probability for all of them, then Ableton is going to (effectively) toss a coin for each note. In the real world, when we toss a coin 8 times, we don’t always get 4 heads and 4 tails. Sometimes we get 3 heads, 5 tails (or vice versa), and occasionally outcomes like 2 heads, 6 tails. Imagine if in the coin toss, heads means that Ableton plays the note. Then the number of notes that gets played will vary each time the chord is played - sometimes it will be 3, sometimes 6 etc. This means that you can specify as many notes as you like, and tune the probability until you get something that you like the sound of, depending on whether you want more or fewer notes in the resulting chord. It also means that careful choice of notes from the scale within the chord allows you to sometimes get rich, complex chords, sometimes chord inversions.
By specifying higher probability for “root notes” in the chord, you can anchor the chord to a particular scale. As a Lazy (but creative) Producer, you can also allow the tonality (which musical scale) is being implied to vary so that the chords that emerge could fit with a variety of bass root notes, perhaps supplied separately in a different track. Avoiding the third (minor / major) or seventh of the scale can make it easier to achieve this kind of fluid and ambiguous tonality. For more discussion on scales and note choices see Process - Using scales
In that same recipe, I have applied this idea across tracks as well. Using the same MIDI chord idea across all tracks, but then changing clip lengths within tracks (so each clip within a track has a different length) and between tracks (so that adjacent clips in a scene have different lengths) and then coupling this with Follow Actions as described in Process - Follow Actions to progress through the clips, means that the chord patterns change more subtly and gradually than having block changes in tonality and scale every 4 or 8 bars. Including note-wise probability within clips also means that the next time the clip plays you get a slightly different result. Again, balancing something predictable - chords with a sequence of tonality / predictable root notes - with the unpredictable - exactly what notes are being played from the chord and that occasionally the chords could work in both keys - means that the listener takes longer to get bored with the sequence.
Live 12 - Grouped notes
Ableton Live 12 introduced the ability to group MIDI notes and then define whether all of the notes in that group will play or only one note within the group. This can apply to notes in a chord, or notes in a sequence - basically any of the notes that you define to be within the group. This can be useful as it means that within the group you can define that exactly one of the notes will play, or that all of the grouped notes will play, which is more deterministic (i.e., rules-based) than the purely probabilistic approaches discussed earlier. Having said that, you can also apply probability to the group, so that with say 50% probability, all of the grouped notes will play - allowing you to write a specific set of “fill” notes in a drum part that will play with a given probability. You can also set probability along with the “play one” group rule. We’ll look at some concrete examples in Tools - Live12 Overview.