
The Sampler instrument from Ableton Live is often used to slice and dice breaks and loops, or to produce multi-sampled instruments that allow you to recreate sounds and playback across the keyboard. But in our context we’re going to use it to simply play back a longer textured sound sample and apply some modulation to the cutoff, producing a drone sound. We can then throw this through a barrage of effects - either using Return channels or via individual audio effects with the sampler output routed into each. We’re effectively reusing an earlier idea, but this time we’re starting with Sampler as our sound source. You could alternatively use the audio output from PaulStretch as the drone generator. The benefit of using Sampler is that we can add MIDI effects to (randomly) change the pitch of the sample so that it doesn’t have to be consistent from one loop to another. Other sample-based instruments like the Max for Live Granulator will allow you to do similar.
Create a track with the Sampler instrument and one clip with a single note of 8 or 16 bars.
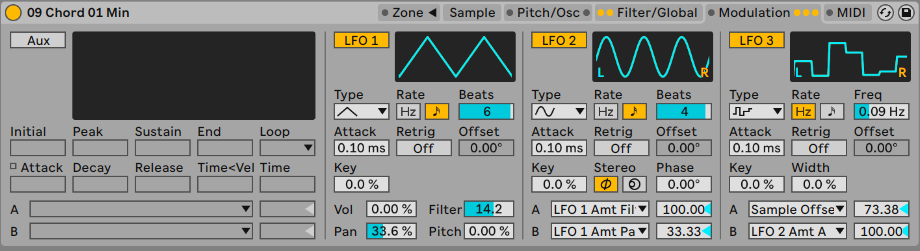
In Sampler’s Filter/Global tab, set the amplitude envelope to have a long attack and a very long release (several seconds each). This will allow the notes to blend and overlap smoothly.
In the Sample Modulation section, create some modulation on Filter, Sample Offset and other parameters so that the sounds morph and change over time rather than staying static. You can also modulate the LFO amounts or rates in LFO2 and LFO3 so that the modulation itself isn’t static. Modulating the Sample Offset makes Sample work a little like a granulator - instead of starting at the beginning of the sample each time, the modulation picks a new position to start from. This prevents the sound from being too predictable with each new note.
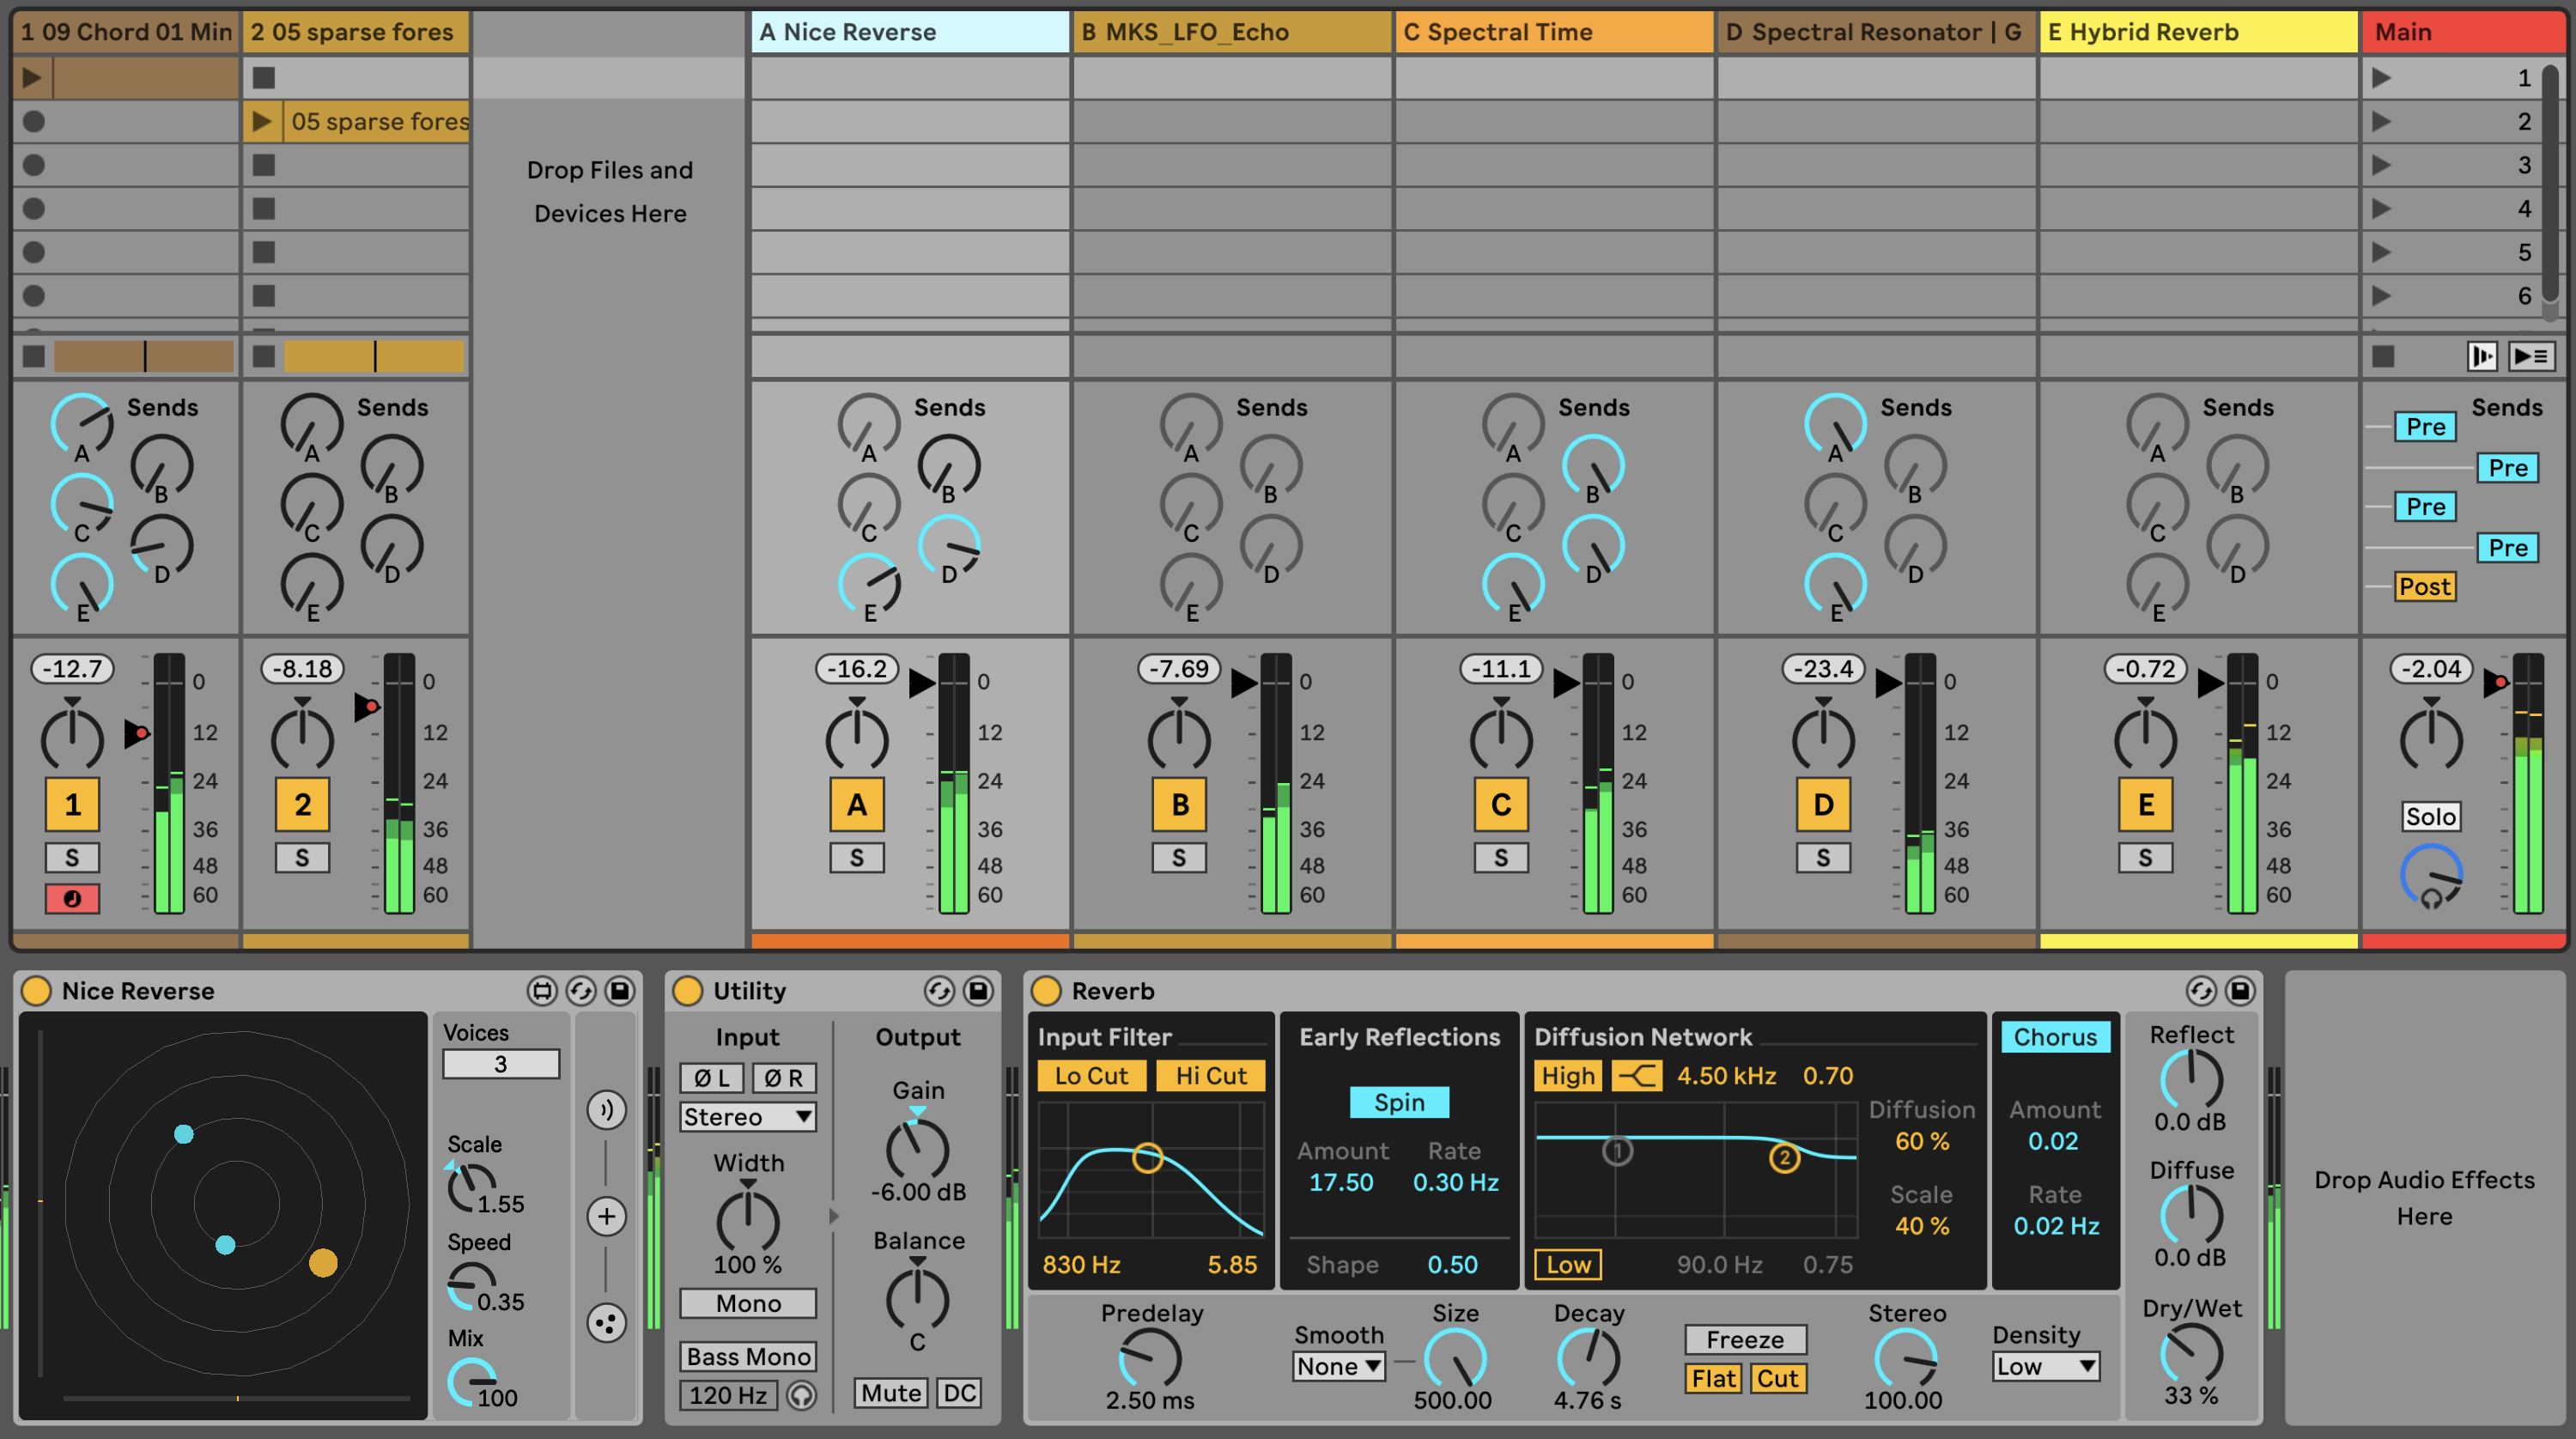
In the example below the Sampler instrument is in Channel 1 and is sending audio out to a variety of FX channels. Note that the Return channels are also routing audio around between them to further add layers of effects. You can see that Return A (the “Nice Reverse + Reverb” effect) is sending audio out to Return D (Spectral Resonator) and that that channel is sending audio back to Return A. Using feedback to route audio signal between Return channels is a little risky as sound can sometimes build up quickly if channels are eventually routed back into themselves. Adding a Limiter to the Return or Main channels would prevent runaway sound feedback causing physical damage to ears or speakers.
Spectral Time and Spectral Resonators are interesting effects to add texture and resonance into fairly static inputs (like our drone here).
You can apply MIDI effects to the Sampler track to pick a new random & quantised note each time the clip restarts. Unlike using an audio clip, using Sampler allows us to repitch the sound through different MIDI notes.
Once you have a setup that produces pleasing results, try swapping in a different pad sample. Doing this allows you to change up the sounds generated, as each sample will have different tones, resonances and features.
Press play. Listen to what you hear, and refine settings if necessary.
You can hear my version of this track here: https://soundcloud.com/mikeksmith/6_sampler-drone-6